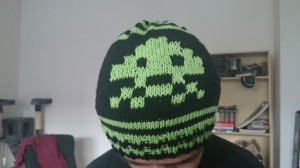
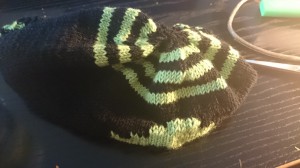
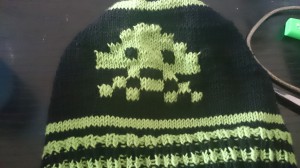
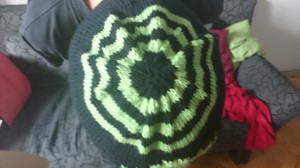
Years ago, I started these and gave them all around. However, I never published a pattern for them. With an upcoming move, I remembered that I promised someone to make them one and haven’t managed in five years (there are _good_ reasons for that, though). Finally, I made another one and this time, I thought of writing things down. So enjoy this little friend. (I also plan on doing one with another space invader, so if you want a more iconic version, stay tuned.)
Materials you need:
- 3.5 mm double pointed needles (dpns) (or circulars for magic loop method)
- 2 balls of yarn (I used Lana Grossa Cool Wool for that project, but any sports weight will do) in different colours (I will use the actual colours used here to explain the pattern)
- stitch markers
- tapestry needle
Abbreviations (a.k.a. stitches you should know):
- k – knit
- p – purl
- ktbl – knit through back loops
- k2tog – knit two together
- stb – switch to black
- stg – switch to green
Techniques you should know (because I will not explain them; there are already so many helpful videos and tutorials out there!):
- intarsia
- intarsia in the round
- how to switch colours effectively horizontally and vertically
Pattern:
- 2×2 rib: 2ktbl, 2p (throughout the round)
Steps:
- with black: cast on 120 stitches
- distribute stitches on needles (if you use dpns) as you like, join the round, being careful not to twist
- work 3 rows in 2×2 rib
- stg, repeat step 3
- stb, repeat step 3
- repeat step 4
- stb, k 3 rows
- stg, k 3 rows
- repeat step 7, k 3 more rows
- k48, stg, k3, stb, k3, stg, k3, stb, k6, stg, k3, stb, k3, stg, k3, stb, k48 (you start intarsia in the round for the end of the round)
- p48, stg, p3, stb, p3, stg, p3, stb, p6, stg, p3, stb, p3, stg, p3, stb, p48
- repeat step 10
- p51, stg, p3, stb, p3, stg, p6, stb, p3, stg, p3, stb, p51
- k51, stg, k3, stb, k3, stg, k6, stb, k3, stg, k3, stb, k51
- repeat step 13
- k54, stg, k3, stb, k6, stg, k3, stb, k54
- p54, stg, p3, stb, p6, stg, p3, stb, p54
- repeat step 16
- p48, stg, p24, stb, p48
- k48, stg, k24, stb, k48
- repeat step 19
- k48, stg, k6, stb, k3, stg, k6, stb, k3, stg, k6, stb k48
- p48, stg, p6, stb, p3, stg, p6, stb, p3, stg, p6, stb, p48
- repeat step 22
- p51, stg, p18, stb, p51
- k51, stg, k18, stb, k51
- repeat step 25
- k54, stg, k12, stb, k54
- p54, stg, p12, stb, p54
- repeat step 28
- p57, stg, p6, stb, p57
- k57, stg, k6, stb, k57
- repeat step 31
- k 6 rows
- stg, k 3 rows
- stb, k 3 rows
- stg, (k13, k2tog) around, k 1 row, (k12, k2tog) around
- stb, (k11, k2tog) around, k 1 row, (k10, k2tog) around
- stg, (k9, k2tog) around, k1 row, (k3, k2tog) around
- stb, (k2, k2tog) around, k1 row, (k1, k2tog) around
- thread yarn twice through remaining stitches and pull tightly
- weave in ends
- set your intarsia straight
- block if wanted
- done!



Leave a comment